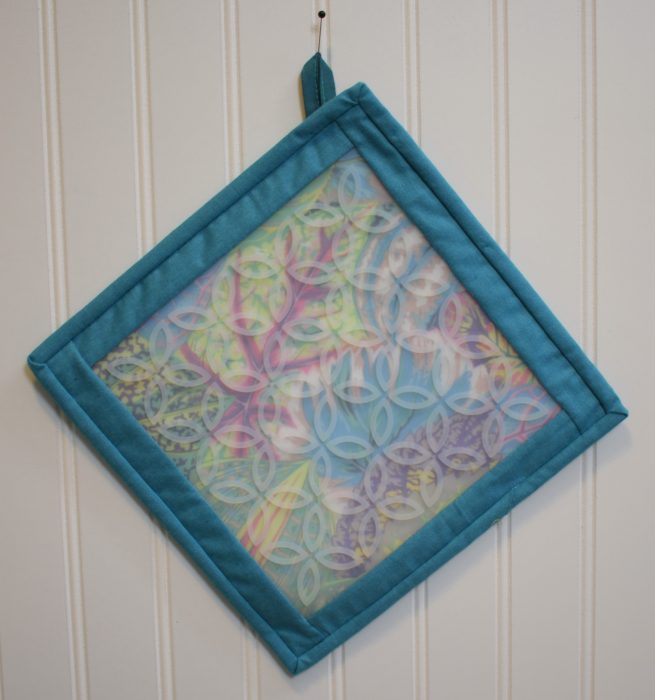
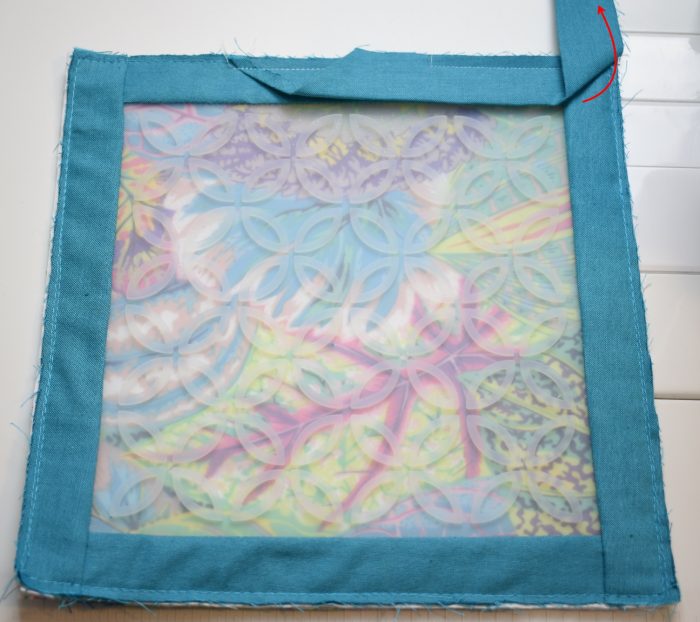
I’d like to share with you today my favorite way of binding the silicone trivets. If you’ve done some quilting, you’re likely to know that there are many ways to sew on binding.
But what about small projects like the trivet?
I like the method below because the binding is cut at an angle, so there’s less bulk in the seam when you fold it to the backside, but yet it’s simple to do on a small trivet-size project.
So, let’s walk through the steps, as shown on the large trivet.
We’re at Step 6 in the pattern for the Option 1 with binding and no hand pocket. With this binding method, you’ll need one 2-1/4″ strip of fabric the width of fabric (selvage to selvage of 40″ wide fabric), or two strips you’ve sewn together binding strips from your fat quarters. This is less than you’d need using some binding methods.
WST = Wrong Sides Together
Prep the Binding
1.Fold the binding in half WST along long edge and press. Unfold binding and fold down the right end of binding at a 90 degree angle WST so that it aligns with the bottom edge, as shown below. Press.
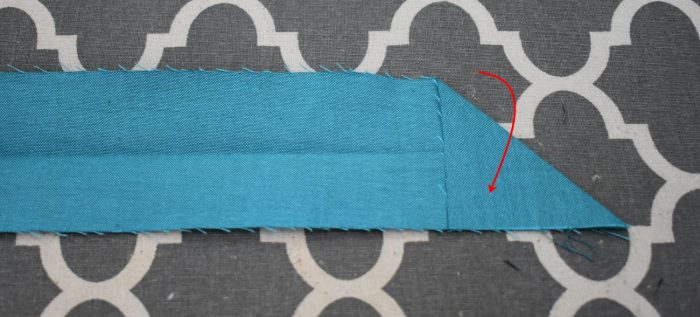
2. Trim the angled edge 1/4″ past the fold.
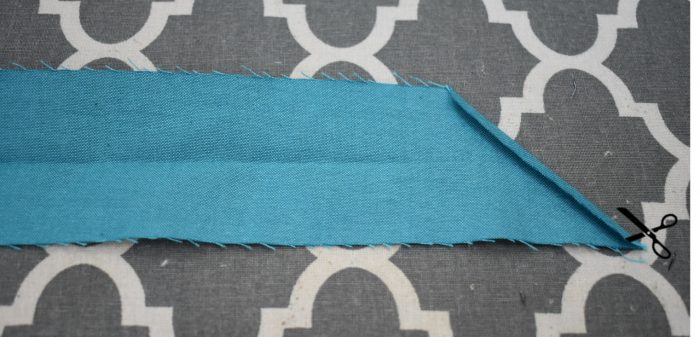
3. Re-fold and press again. The end will form a triangle as shown below. We’ll call this End #1.
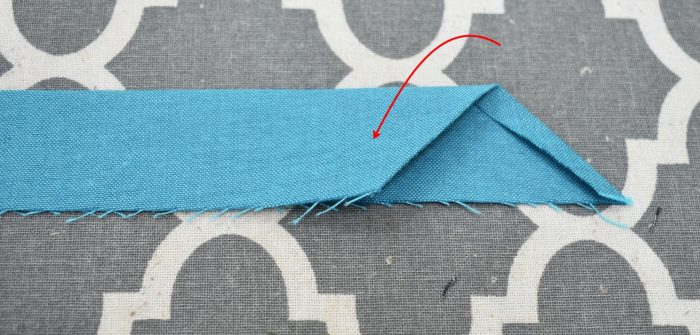
Attach the Binding
- Starting half way down one side of the trivet, open up binding and align End #1 with right edge of trivet. Stitch only the bottom layer of the binding about 4″, using a 1/4″ seam. Stop and fold the top layer of binding down.
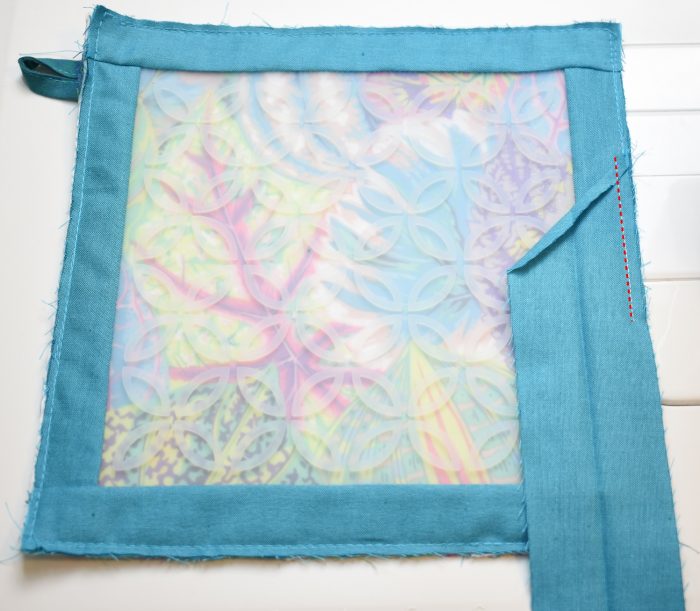
2. Stitch through both layers from that point forward until you reach 1/4″ from corner. Backstitch a stitch or two and remove from machine.
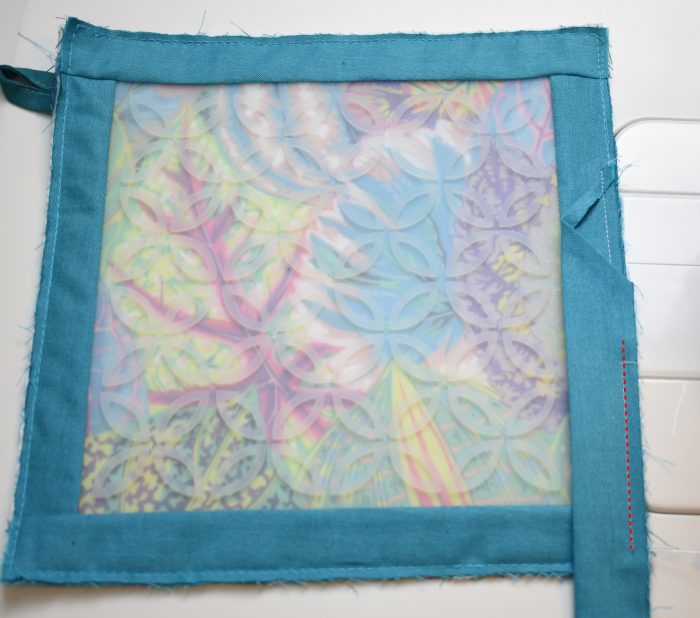
3. Flip up binding to get a diagonal fold.
4. Fold binding back down, with the fold at the top flush with the edge of the trivet. Stitch that side of the trivet. I recommend starting 1/4″ down from top and backstitching up to the fold rather than starting at the top fold, as it’s a little easier and stitch side. Stop stitching again 1/4″ from the bottom edge, and backstitch a stitch or two.
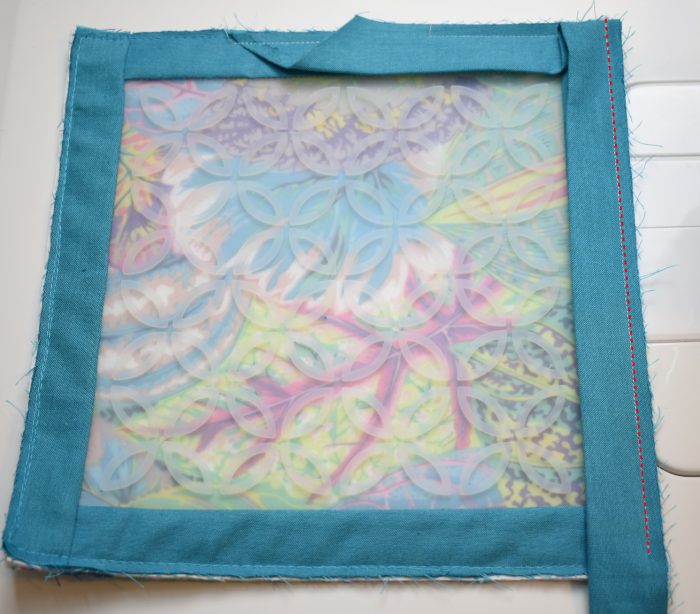
5. Repeat Steps 2-4 until you are back to the side where you started. Stitch about 1-2″ along that side then backstitch and remove from machine.
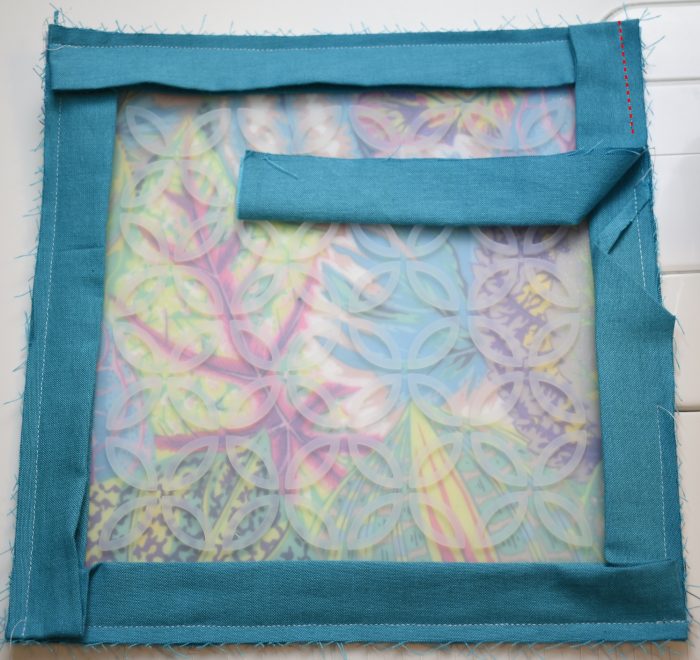
6. To finish off the binding, you’ll want to mark a diagonal line on the binding. You’ll want the diagonal line to start in the center of the triangle on End #1. Mark the starting point on End #2 with a pin, then draw the diagonal line. Cut along diagonal line.
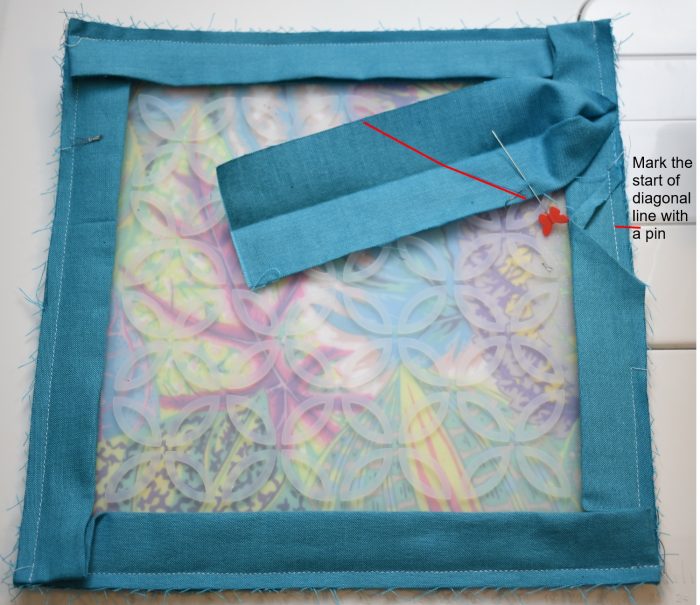
7. After cutting on the diagonal line, refold the binding and tuck it into End #1.
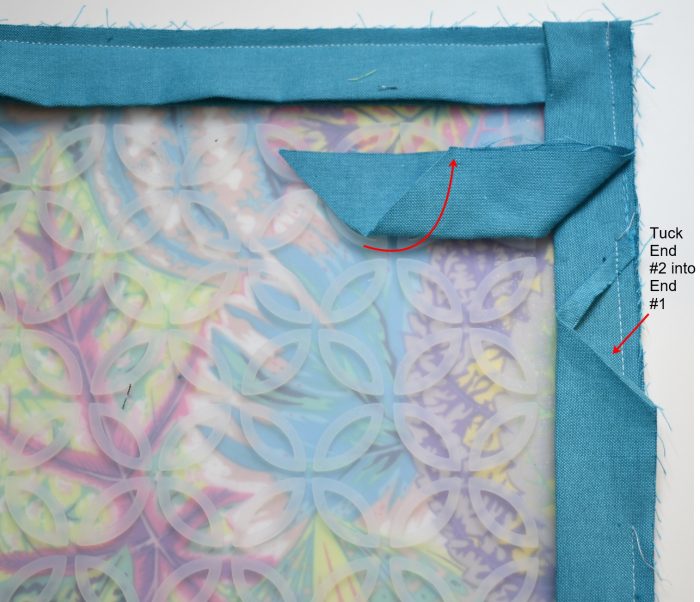
8. Stitch the remainder of binding to trivet starting where you left off and stitching to where you started stitching through both layers. Backstitch at beginning and end.
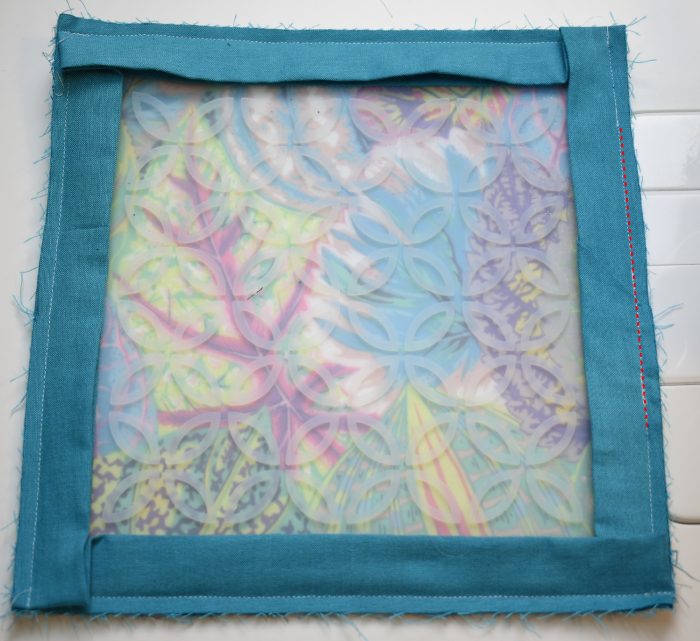
Handstitch binding to back
I recommend handstitching the binding to the backside. It doesn’t take very long for such a small project, and it looks so nice! Here’s a rundown of the steps:
- Starting where the diagonal fold you created meets the backside, tie a knot an bury it in the edge of the trivet seam allowance.
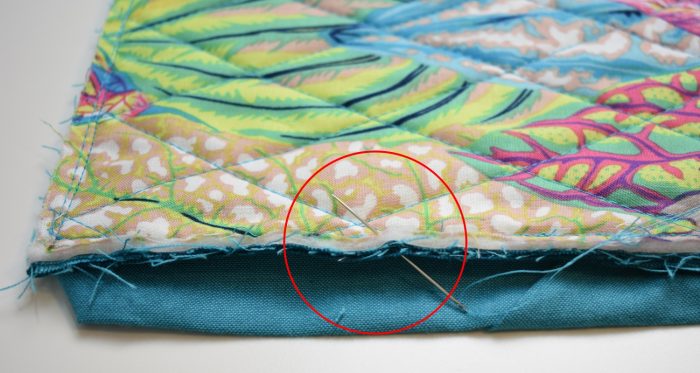
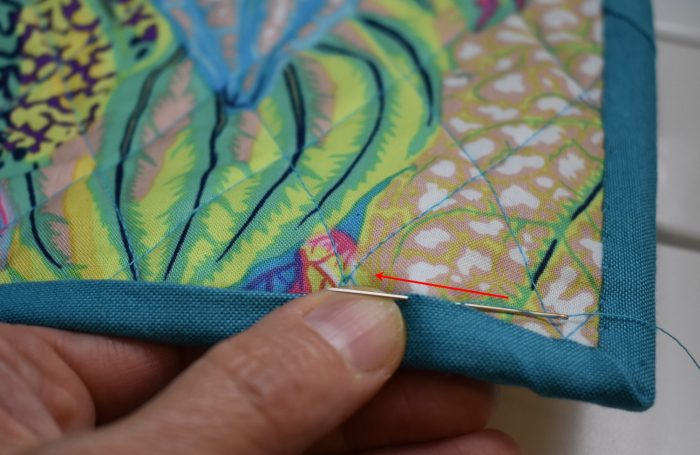
2. Using small slip stitches, stitch down the diagonal fold.
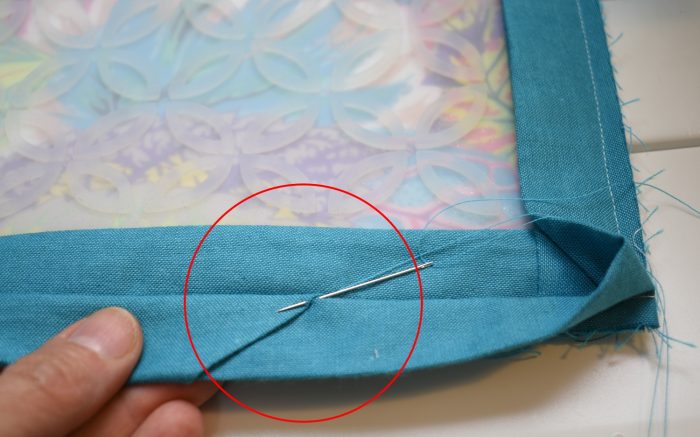
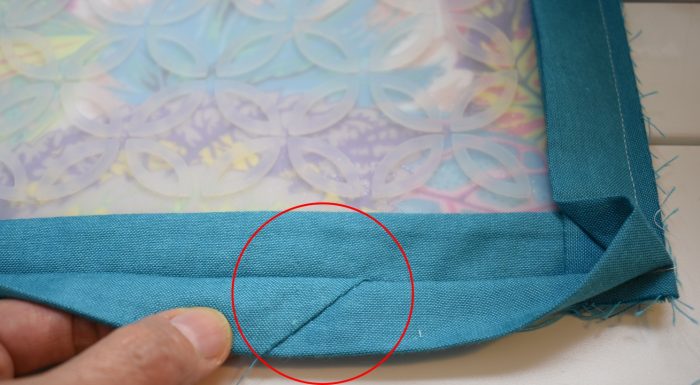
4. Flip trivet to back side. Starting at the diagonal fold you just stitched, slipstitch binding to trivet just inside the machine stitching line all the way to the end of of that side.
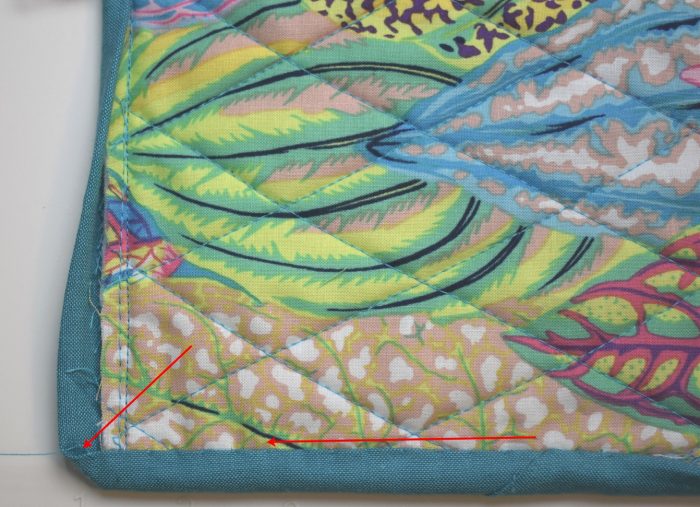
5. Fold the corner up to the machine stitching line, as shown below, and make a stitch or two, then continue slipstitching that side until you reach the end of that side.
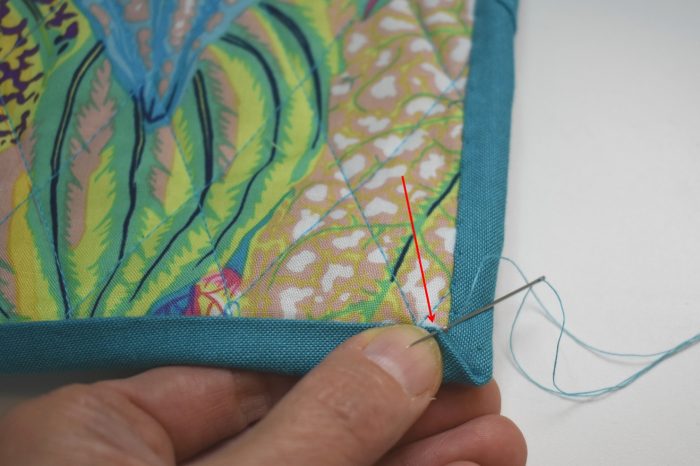
6. Finish the next corner in the same fashion as the first corner, and repeat to finish binding around trivet.
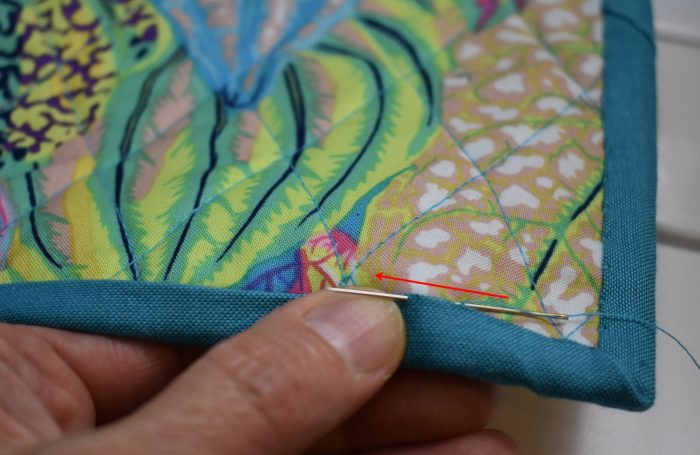
7. When you are back at the beginning, tie a knot and bury it in the binding. Ta-da, you’re done! Go bake a cake?
