Unless you’re making a clutch, pretty much every bag needs at least one handle. Here are some tips to make your handles look really great!
1. Cutting the fabric out straight
Most handles are quite long, and so we are usually folding the fabric in half and cutting a strip with a rotary cutter. One of the things I pay a lot more attention to now than when I was beginning is making sure I’m cutting it straight. That might seem like a simple thing, but it can make a big difference!
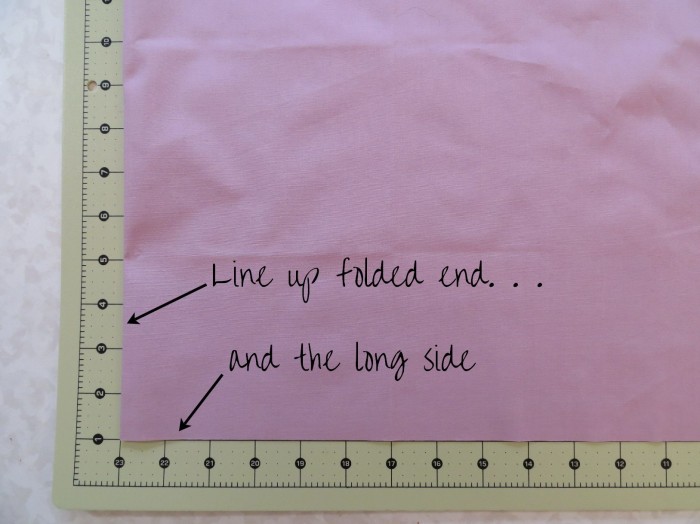
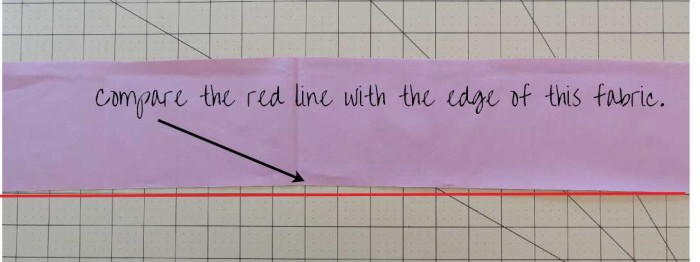
After you fold your fabric in half, make sure you are lining up the folded end as well as the long sides. Otherwise you can end up with a V-effect on the overall piece. Compare the edge of the purple fabric with the red line. It is almost a half inch off. You could still work with this sure, but a half inch will make a noticeable difference in how easily your handle goes together.
2. Interfacing to give it body
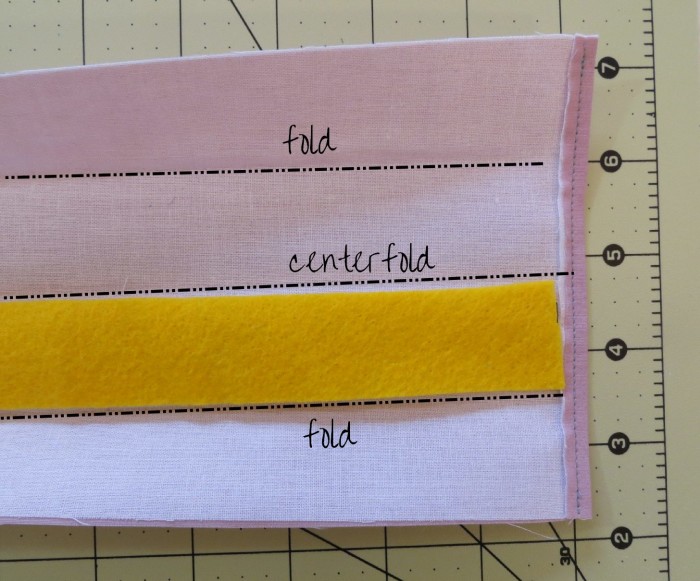
One of the most common ways to make a strap is to fold it in half the long way and then fold the long sides into the centerfold. In addition to adding needed body to the strap, you are making it a LOT easier on yourself by adding the interfacing. It is simply easier to press when the fabric has body.
I really like a woven interfacing for this purpose, such as Pellon’s Shapeflex SF101. Lazy Girl has a great option as well with her Sew Lazy Face It: Firm interfacing.
3. Interlining so that it will wear better over time
One of the earlier cross-body bags I made I decided to skip the interlining to see if it was necessary. A few months later, the edges of my bag strap were showing wear. A lot of wear. Even though I had used some interfacing, the cotton couldn’t stand up to the wear and tear on the handle. It wasn’t long before I was sewing another bag. Not that that’s so bad, no complaints LOL, but still….
When adding interlining, it is best to make it slightly narrower than the finished width of the handle. For example, if your finished handle is going to be 1-1/4″, cut the interlining 1-1/8″ wide. This makes the interlining fit easier in between the folded layers.
4. Keep interlining out of your seams.
I recommend cutting the interlining shorter than the finished length of the handle so that it isn’t so bulky in the seams. Take your finished length and subtract the seam allowance. If you are attaching your handle to hardware, subtract an amount twice as much as the amount you will turn under on the ends.
What products to use for the interlining? Ha, I think I’ve tried just about everything! I like Pellon 926 or Lazy Girl Stiff Stuff. I also like using felt or muslin interfaced with Pellon Sf101. The idea is to add a little bit of body but not a lot of bulk. I would definitely steer clear of Peltex or Timtex. These are too thick and stiff for handles. The yellow felt above was leftover from my son’s school project, and it worked just great (and since the interfacing is fused onto the fabric, the color of the interlining won’t show through to the outside).
5. Topstitching the easy way
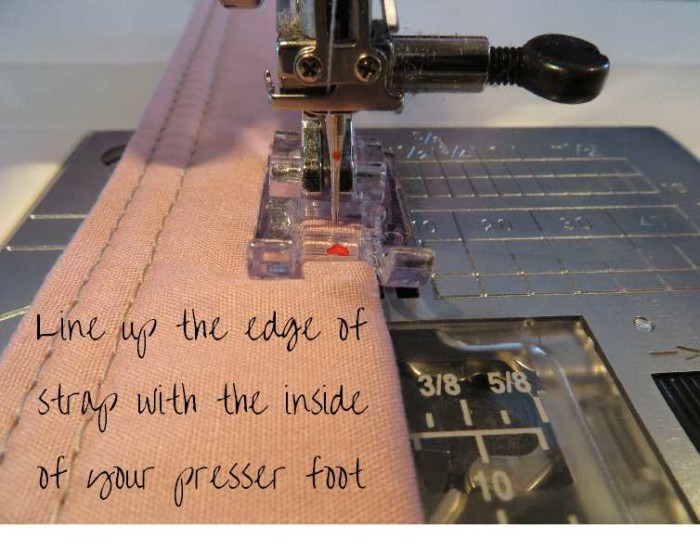
When you are stitching your handle together, it is common to have one or two rows of stitching along each long side. My personal favorite is to have a double row of stitching. l like to line up the edge of the handle with the inside of my presser foot. On my machine, the inside of my presser foot is a generous 1/8″. If I’m making a second line of stitching, I line up the inside of my presser foot with the first line of stitching.
There are other ways to do it. One way is to use a quilting foot. The 1/4″ guide will keep your stitch straight. Also, you can adjust the needle position to get the distance you want. Whichever way you do it, you’ll get much straighter stitching if you line the strap up with the inside or outside of the presser foot than if you just use your eye to judge the distance.
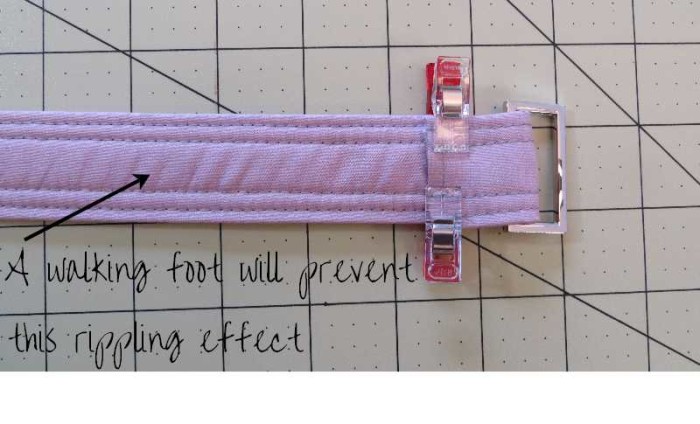
And one more bonus tip, use a walking foot to avoid this rippling effect. The walking foot feeds the layers through your machine evenly to prevent unwanted pulling on the fabric.
Enjoy your bag making, and I hope you found a few helpful tips here for the next handles you make. I’d love to hear your ideas for handle-making. Have a good tip? Add it to the comments below!



I have done everything in your tut expect used woven interfacing. I will give it a try. Super tutorial! Thank you.
I really need to get better at using my walking foot. As in I need to remember to use it. Thanks for the tips.
Thank you Lisa for this nice tutorial!
This is my first visit to your site! Super tutorial. I always cut the selvage from my home dec fabrics. It make GREAT interfacing for straps! I love the extra strength it give and very little added to the bulk. It’s wider than normal so the width is perfect!
Thanks Katherine. Love the home dec fabric idea for strap interfacing too. Just something to give it body, right, but not a lot of bulk! Thanks for sharing 🙂